If you want to create your own fonts, then Windows 10 provides you the opportunity to make fonts with Microsoft Font Maker tool. It is available in the Windows store and can be downloaded and was first introduced with the beta release of Windows 10 OS update.
Creating your own fonts is a marvelous improvisation of your writing skills, thus designers, artists, free lance workers, and illustrators find this tool quite reliable and productive in their pursuit. This tool is only compatible with Windows 10, and has not been aligned with other lower versions yet, thus users are not fully aware of it. Besides, one of the indispensible requirements to run MS Font maker is to have a device with touch screen installed with Windows 10 OS, for instance tablets. Devices with mouse are not suitable for you to make swift and precise strokes and the writing would not look more of a real handwriting.
The article would review the tool in parts as per the aspects which you first need to know in order, so keep reading.
#1: How to Create Font with Microsoft Font Maker
Ensure that your pen is orderly connected with your tablet via Bluetooth before you start using Font maker. Otherwise go to Settings> Devices> Pen & Windows ink make changes in the pen’s settings. You can also click on the pen icon directly from the taskbar to pull over the necessary changes.
Now download Font Maker
Install it accurately and since it is the first time after your launch, Microsoft will ask your permission to collect inkstrokes for enhancement. This is sort of optional, so you can skip if you desire.
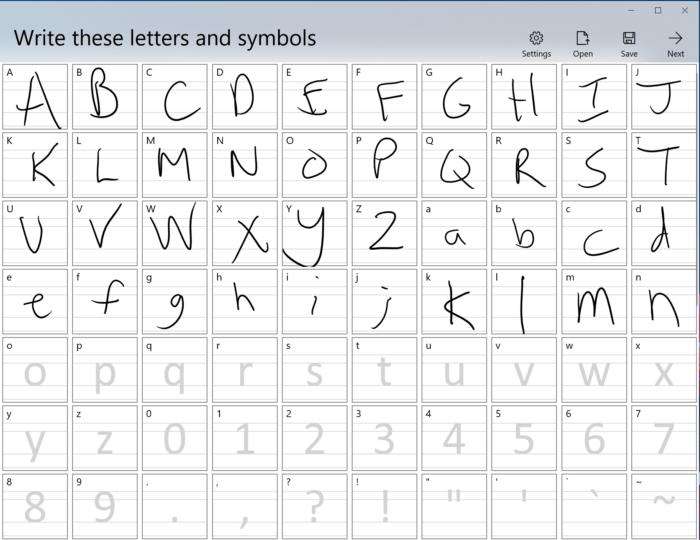
NOTE: If you choose to go with the inkstroke improvisation, you will be shown kindergarten letter templates to select which looks somewhat like this.

This guide is solely meant for English and not for any other language, so don’t take the details casually. Ink each character as soon as possible and introduce stylus if you wish. Make sure to make to slower and harder pen strokes to get better imprints and a clearer view.
One more thing, backspace and Ctrl + Z key combination will not undo the error if any you make in the middle of your work. Save the fonts finally using “Save” option and save the font with jfproj extension.
#2: How to fine-tune the Fonts
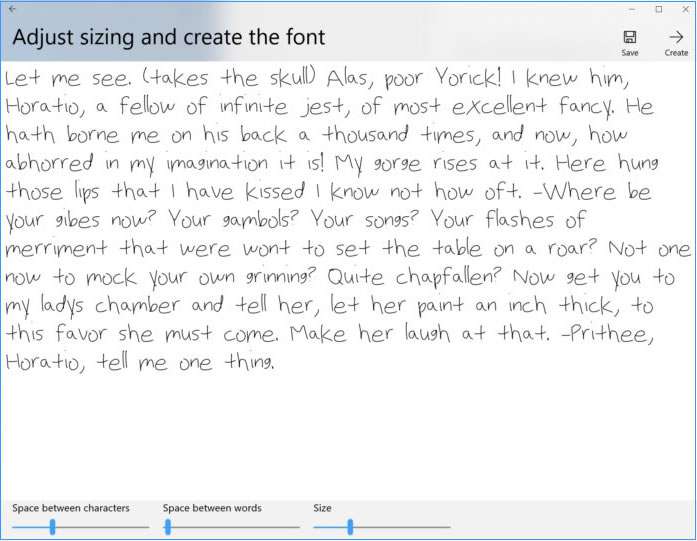
Now the next page that appears shows you three phases. First the spacing between letters and words is determined, and then the fonts are displayed in action, like a page from hamlet. In the last phase, you can change the size of the fonts. If you find anything mistakable, you can hit “Backspace” to go back to the previous phases to change the settings you made.
The size of the font in real does not matter as you can adjust it in WordPad or Microsoft Word processors, etc afterwards.

After everything is done, click “Create” to send or export the font you just created.
#3: How to Utilize the Newly Created Font
Although by default Windows is supposed to save the newly created fonts in the Font folder, but it does not. So for now save the font somewhere else, and then right click on the “Font” and copy paste it to the Font folder later. You will instantly get a notification that your new font is successfully installed on Windows.
Now if you open up and word processor, like WordPad or MS Word, you will find the new font in the font list.

Conclusion:
The only demerit with this tool is that Windows OS versions other than 10 don’t support it and moreover, you need a touch screen device to make the experience and handwriting more real.


