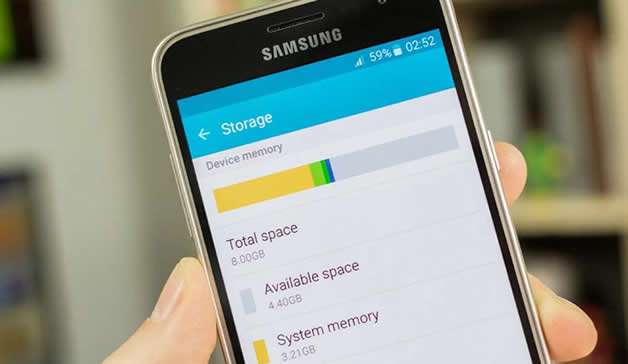
Transferring photos from an Android device to a Windows 10 computer is a relatively straightforward process. The following steps will guide you through the transfer:
1. Connect your Android device to your computer using the USB cable that came with it.
2. On your Android device, enable file transfers by going into “Settings” and selecting “Connected devices” or similar options depending on which version of Android you have installed.
3. Open File Explorer on your Windows 10 PC and select “This PC” in the left-hand column if necessary before clicking on “Android” (or whatever name was given to it during connection) in the Devices & Drives folder at the bottom of this section – this should open up files stored within your phone’s internal storage as well as any external SD cards connected via USB adapter etc..
4. Once inside these folders, locate where images are stored e.g., DCIM folder for pictures taken with camera or Pictures folder for other downloaded/transferred images, then select them all and drag them onto a local directory such as Documents or Desktop for easy access / backup purposes etc..
What is the easiest way to transfer photos from Android to PC?
How do I transfer photos from Android phone to Windows 10 wirelessly?
One of the easiest and most efficient ways to transfer photos from an Android phone to a Windows 10 device wirelessly is by using Bluetooth. To do this, first make sure that both devices have Bluetooth enabled. Then on your Android device, go into settings and select “Send or receive files via Bluetooth”. On your Windows 10 device, open up the Action Center and click “Bluetooth”. Once both devices are paired together, you can then select which photos you would like to send over to your Windows 10 computer from the list of available options on your Android phone.
How do I get pictures off my Android phone?
Getting pictures off your Android phone is a relatively easy process. First, you will need to connect your device to a computer via USB cable or Wi-Fi connection. Once connected, you can then transfer photos from your phone to the computer using either Windows File Explorer (Windows) or Image Capture (Mac). Depending on which method you choose, different steps may be required.
If transferring via USB cable:
1. Connect the micro-USB end of the cable into your Android device and plug the other end into an available USB port on your computer.
2. Open up File Explorer (Windows) or Finder (Mac), depending on which operating system you are running.
3. Locate and select “This PC” in Windows, or “Computer” in Mac OS X under Devices and Drives section within File Explorer/Finder window; this should open up all of the drives connected to your computer including external hard drives as well as any mobile devices that have been connected such as your Android Phone
4. Click on “Internal Storage” for most phones with removable storage cards this should show both internal memory and SD card contents; scroll down until you find DCIM folder containing all images stored by camera app
5 .Select desired folders/photos from here then drag & drop them onto desktop/folder of choice
If transferring via Wi-Fi connection:
1 .Open Settings menu from home screen 2 .Tap on Wireless & Networks option followed by Wi-Fi settings 3 .Enable it if it isn’t already active then select wireless network 4 .Go back to main settings page 5 .Under System tab select about option 6 Select Status 7 Find IP address – make note of it 8 On another device i e laptop tablet etc open web browser 9 Type in IP address noted earlier 10 A login prompt should appear 11 Enter username password found online 12 Log in 13 From there files can be accessed 14 Copy paste files wherever needed 15 Disconnect when done
What app can I use to transfer photos from Android to Windows?
There are several apps that can be used to transfer photos from Android to Windows. Depending on the version of your operating systems, you may have access to pre-installed or third party applications that can make the process easier.
If you’re running Windows 10, Microsoft offers its own Your Phone app which allows users to sync their Android device with their PC and transfer images wirelessly over Wi-Fi. To get started, download and install the app on your device and follow the instructions in order to pair it with your computer.
Alternatively, if you’re looking for a more comprehensive solution for transferring files between devices, Droid Transfer is a great option as it supports both wired and wireless connections across multiple platforms including iOS and Mac OS X. The tool also includes backup capabilities so you can easily store any important data onto your computer. You’ll need to download an additional desktop application in order for it work though so bear this in mind before getting started.
Finally, another good choice is Pushbullet which enables users to send images directly from one device to another without having go through cables or cloud storage options such as Dropbox or Google Drive first. All you need is an active internet connection on both ends in order for it work properly; once installed simply select the photo(s) that you want send and hit ‘send’.
How do I transfer thousands of photos from my Android?
Transferring thousands of photos from your Android device can seem daunting, but it doesn’t have to be. Here are some steps you can take to make the process easier and more efficient.
1. Connect your Android phone to a computer via USB or Wi-Fi connection.
2. Use an app that allows you to easily transfer multiple files at once, such as Google Photos or Dropbox Transfer.
3. Select all the images you want to move and copy them into a folder on your computer or external storage device (e.g., flash drive).
4. Disconnect the phone from your computer when finished transferring files, ensuring all photos have been successfully transferred over before disconnecting the devices completely!
What is the fastest way to transfer pictures from phone to computer?
The quickest way to transfer pictures from a phone to a computer is by using the USB cable that came with your phone. To do this, connect the smaller end of the USB cable into your device and then plug in the larger end of the cable into an available USB port on your computer. Once connected, you should be able to access your photos and copy them over onto your computer. Alternatively, if you have both devices connected to Wi-Fi, you could use an app such as Dropbox or Google Photos which allow for quick data transfers between devices.
What is the fastest way to transfer files from Android to PC wirelessly?
The fastest way to wirelessly transfer files from an Android device to a PC is by using an app such as AirDroid. With AirDroid, you can quickly and easily transfer photos, videos, music, documents and other types of files between your Android device and PC over the same Wi-Fi network. Here are the steps for setting up and transferring with AirDroid:
1. Download the free version of AirDroid on both your Android device and PC from the respective app stores (Google Play or Apple App Store).
2. Log into both the mobile application on your phone/tablet as well as web interface on your computer using either Facebook or Google credentials.
3. Connect both devices to the same Wi-Fi connection so that they can communicate with one another without any interruption in data flow speed or stability.
4. On your Android device, open “AirDroid” settings by tapping on three vertical dots in top right corner then choose ‘Transfer Files’ option which will appear at bottom of screen after few seconds loading time period has passed away successfully if not immediately visible upon opening settings menu!
5 . Now click on plus (+) icon present inside file browser window located near left side panel where all available folders & directories are listed out including those stored within external SD card too; this action will open new pop up prompt asking user whether he wants upload single item type through selection box options like photo / video / document etcetera OR multiple items simultaneously via batch selection method respectively!
6 . Choose appropriate choice according to individual needs – then proceed further ahead towards pressing green colored button labelled ‘Start Transfer’ found at bottom portion part itself once done selecting desired items accordingly; this will initiate process straightaway sending chosen contents across wirelessly instantaneously until completion status message appears stating success rate along with total number bytes sent/received accordingly afterwards if everything went smoothly throughout entire duration taken during transmission phase progress bar should turn blue indicating successful task accomplishment finally!
What is the easiest way to wirelessly transfer files from Android to PC?
The easiest way to wirelessly transfer files from an Android device to a PC is by using Bluetooth. To do this, you’ll need both the Android device and the PC to have Bluetooth capability.
1. On your Android phone, go into Settings and make sure that Bluetooth is enabled and visible to other devices.
2. On your PC, open up the Control Panel (or search for “Bluetooth”) and turn on both visibility for other devices as well as allowing file transfers over Bluetooth if it’s not already enabled.
3. Your computer should now be able to detect any nearby devices with their own visibility on – pair each of them when prompted on both sides until you see a connection established between the two systems in question (your Android device & your PC).
4. Once they’re connected, you can send files from either one of these two systems – just drag-and-drop the desired file(s) onto its icon in either File Explorer or Finder depending on what kind of operating system you use! And that’s it; all done!
{“@context”:”https://schema.org”,”@type”:”FAQPage”,”mainEntity”:[{“@type”:”Question”,”name”:”How do I transfer photos from Android phone to Windows 10 wirelessly?”,”acceptedAnswer”:{“@type”:”Answer”,”text”:”nnOne of the easiest and most efficient ways to transfer photos from an Android phone to a Windows 10 device wirelessly is by using Bluetooth. To do this, first make sure that both devices have Bluetooth enabled. Then on your Android device, go into settings and select u201cSend or receive files via Bluetoothu201d. On your Windows 10 device, open up the Action Center and click u201cBluetoothu201d. Once both devices are paired together, you can then select which photos you would like to send over to your Windows 10 computer from the list of available options on your Android phone.”}},{“@type”:”Question”,”name”:”How do I get pictures off my Android phone?”,”acceptedAnswer”:{“@type”:”Answer”,”text”:”nnGetting pictures off your Android phone is a relatively easy process. First, you will need to connect your device to a computer via USB cable or Wi-Fi connection. Once connected, you can then transfer photos from your phone to the computer using either Windows File Explorer (Windows) or Image Capture (Mac). Depending on which method you choose, different steps may be required. nnIf transferring via USB cable: n1. Connect the micro-USB end of the cable into your Android device and plug the other end into an available USB port on your computer. n2. Open up File Explorer (Windows) or Finder (Mac), depending on which operating system you are running. n3. Locate and select u201cThis PCu201d in Windows, or u201cComputeru201d in Mac OS X under Devices and Drives section within File Explorer/Finder window; this should open up all of the drives connected to your computer including external hard drives as well as any mobile devices that have been connected such as your Android Phone n4. Click on u201cInternal Storageu201d for most phones with removable storage cards this should show both internal memory and SD card contents; scroll down until you find DCIM folder containing all images stored by camera app n5 .Select desired folders/photos from here then drag & drop them onto desktop/folder of choice nn If transferring via Wi-Fi connection: n1 .Open Settings menu from home screen 2 .Tap on Wireless & Networks option followed by Wi-Fi settings 3 .Enable it if it isn’t already active then select wireless network 4 .Go back to main settings page 5 .Under System tab select about option 6 Select Status 7 Find IP address – make note of it 8 On another device i e laptop tablet etc open web browser 9 Type in IP address noted earlier 10 A login prompt should appear 11 Enter username password found online 12 Log in 13 From there files can be accessed 14 Copy paste files wherever needed 15 Disconnect when done”}},{“@type”:”Question”,”name”:”What app can I use to transfer photos from Android to Windows?”,”acceptedAnswer”:{“@type”:”Answer”,”text”:”nnThere are several apps that can be used to transfer photos from Android to Windows. Depending on the version of your operating systems, you may have access to pre-installed or third party applications that can make the process easier. nnIf youu2019re running Windows 10, Microsoft offers its own Your Phone app which allows users to sync their Android device with their PC and transfer images wirelessly over Wi-Fi. To get started, download and install the app on your device and follow the instructions in order to pair it with your computer. nnAlternatively, if youu2019re looking for a more comprehensive solution for transferring files between devices, Droid Transfer is a great option as it supports both wired and wireless connections across multiple platforms including iOS and Mac OS X. The tool also includes backup capabilities so you can easily store any important data onto your computer. You’ll need to download an additional desktop application in order for it work though so bear this in mind before getting started. nnFinally, another good choice is Pushbullet which enables users to send images directly from one device to another without having go through cables or cloud storage options such as Dropbox or Google Drive first. All you need is an active internet connection on both ends in order for it work properly; once installed simply select the photo(s) that you want send and hit ‘send’. “}},{“@type”:”Question”,”name”:”How do I transfer thousands of photos from my Android?”,”acceptedAnswer”:{“@type”:”Answer”,”text”:”nnTransferring thousands of photos from your Android device can seem daunting, but it doesn’t have to be. Here are some steps you can take to make the process easier and more efficient. n1. Connect your Android phone to a computer via USB or Wi-Fi connection. n2. Use an app that allows you to easily transfer multiple files at once, such as Google Photos or Dropbox Transfer. n3. Select all the images you want to move and copy them into a folder on your computer or external storage device (e.g., flash drive). n4. Disconnect the phone from your computer when finished transferring files, ensuring all photos have been successfully transferred over before disconnecting the devices completely!”}},{“@type”:”Question”,”name”:”What is the fastest way to transfer pictures from phone to computer?”,”acceptedAnswer”:{“@type”:”Answer”,”text”:”nnThe quickest way to transfer pictures from a phone to a computer is by using the USB cable that came with your phone. To do this, connect the smaller end of the USB cable into your device and then plug in the larger end of the cable into an available USB port on your computer. Once connected, you should be able to access your photos and copy them over onto your computer. Alternatively, if you have both devices connected to Wi-Fi, you could use an app such as Dropbox or Google Photos which allow for quick data transfers between devices.”}},{“@type”:”Question”,”name”:”What is the fastest way to transfer files from Android to PC wirelessly?”,”acceptedAnswer”:{“@type”:”Answer”,”text”:”nnThe fastest way to wirelessly transfer files from an Android device to a PC is by using an app such as AirDroid. With AirDroid, you can quickly and easily transfer photos, videos, music, documents and other types of files between your Android device and PC over the same Wi-Fi network. Here are the steps for setting up and transferring with AirDroid: nn1. Download the free version of AirDroid on both your Android device and PC from the respective app stores (Google Play or Apple App Store). nn2. Log into both the mobile application on your phone/tablet as well as web interface on your computer using either Facebook or Google credentials. n3. Connect both devices to the same Wi-Fi connection so that they can communicate with one another without any interruption in data flow speed or stability. n4. On your Android device, open u201cAirDroidu201d settings by tapping on three vertical dots in top right corner then choose u2018Transfer Filesu2019 option which will appear at bottom of screen after few seconds loading time period has passed away successfully if not immediately visible upon opening settings menu! nn 5 . Now click on plus (+) icon present inside file browser window located near left side panel where all available folders & directories are listed out including those stored within external SD card too; this action will open new pop up prompt asking user whether he wants upload single item type through selection box options like photo / video / document etcetera OR multiple items simultaneously via batch selection method respectively! nn 6 . Choose appropriate choice according to individual needs – then proceed further ahead towards pressing green colored button labelled u2018Start Transferu2019 found at bottom portion part itself once done selecting desired items accordingly; this will initiate process straightaway sending chosen contents across wirelessly instantaneously until completion status message appears stating success rate along with total number bytes sent/received accordingly afterwards if everything went smoothly throughout entire duration taken during transmission phase progress bar should turn blue indicating successful task accomplishment finally!”}},{“@type”:”Question”,”name”:”What is the easiest way to wirelessly transfer files from Android to PC?”,”acceptedAnswer”:{“@type”:”Answer”,”text”:”nnThe easiest way to wirelessly transfer files from an Android device to a PC is by using Bluetooth. To do this, you’ll need both the Android device and the PC to have Bluetooth capability. n1. On your Android phone, go into Settings and make sure that Bluetooth is enabled and visible to other devices. n2. On your PC, open up the Control Panel (or search for “Bluetooth”) and turn on both visibility for other devices as well as allowing file transfers over Bluetooth if it’s not already enabled. n3. Your computer should now be able to detect any nearby devices with their own visibility on – pair each of them when prompted on both sides until you see a connection established between the two systems in question (your Android device & your PC). n4. Once they’re connected, you can send files from either one of these two systems – just drag-and-drop the desired file(s) onto its icon in either File Explorer or Finder depending on what kind of operating system you use! And that’s it; all done!”}}]}
