Sending files from a Windows 10 computer to an iPhone can often be a challenge. Whether you want to transfer photos, videos, documents, or any other type of file, it’s important to know the right methods and tools to use. In this blog post, we will explore several methods to send files to an iPhone from a Windows 10 computer. We will provide step-by-step instructions and discuss the pros and cons of each method. So if you’ve been struggling with this issue, keep reading to find the solution that works best for you.
The Challenge of Sending Files to an iPhone from Windows 10:
Transferring files between different operating systems can be difficult due to compatibility issues. While there are several ways to send files from a Windows 10 computer to an iPhone, it’s important to choose the method that suits your needs and preferences. Here are some of the challenges you might encounter when attempting to send files to an iPhone from Windows 10:
- Compatibility issues between Windows and iOS.
- Limited file transfer options within the default iOS ecosystem.
- Lack of a direct file transfer feature in iTunes.
- Difficulty in finding a reliable and easy-to-use third-party software.
Now, let’s explore some of the methods you can use to send files to your iPhone from a Windows 10 computer.
Video Tutorial:
Method 1: How to Send Files to iPhone using iCloud:
One of the easiest and built-in methods to send files to an iPhone from a Windows 10 computer is by using iCloud. iCloud is Apple’s cloud storage service that allows users to store files and sync them across their devices. Here’s how you can send files to your iPhone using iCloud:
Pros:
– Offers seamless synchronization between devices.
– Allows easy access to files from anywhere with an internet connection.
– No need for any additional software or cables.
Cons:
– Requires an iCloud account and sufficient storage space.
– Limited to certain file types.
– Relies on an internet connection.
1. Start by signing in to your iCloud account on your Windows 10 computer. If you don’t have an account, you can create one for free.
2. Open the iCloud app on your computer and navigate to the folder where you want to store the files.
3. Drag and drop the files you want to send to your iPhone into the iCloud folder.
4. Wait for the files to be uploaded to iCloud. The time taken will depend on the size of the files and the speed of your internet connection.
5. Now, on your iPhone, open the Files app and navigate to the iCloud Drive folder.
6. Here, you will find the files you uploaded from your Windows 10 computer. You can preview, open, or save them to your device.
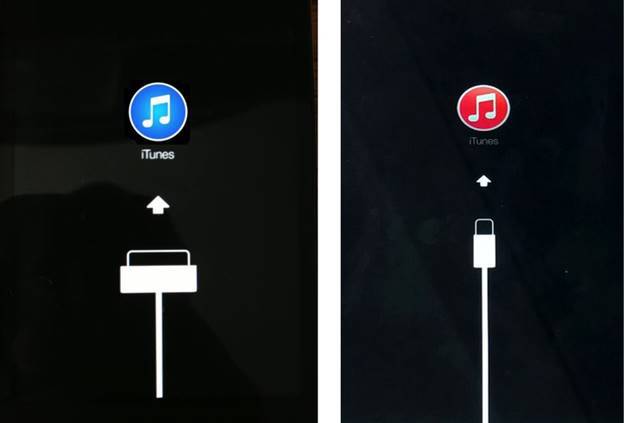
Method 2: How to Send Files to iPhone using iTunes:
Another method to send files to an iPhone from a Windows 10 computer is by using iTunes. iTunes is Apple’s official software for managing devices and transferring files. Although iTunes is primarily used for media files, you can also transfer documents and other types of files. Here’s how you can do it:
Pros:
– Official Apple software with reliable performance.
– Can transfer various types of files, including music, videos, and documents.
– Can create backups of your iPhone data.
Cons:
– Requires the installation of iTunes on your computer.
– Can be complicated for first-time users.
– The file transfer process can be slow at times.
1. Start by downloading and installing iTunes from the official Apple website if you haven’t already.
2. Connect your iPhone to your Windows 10 computer using a lightning or USB cable.
3. Launch iTunes and wait for it to detect your iPhone. If prompted, trust the computer on your iPhone.
4. Click on the device icon in the top-left corner of iTunes to access your iPhone’s settings.
5. In the left sidebar, click on “File Sharing” under “Settings”.
6. In the right pane, you will see a list of apps on your iPhone that support file sharing.
7. Select the app you want to transfer files to and click on the “Add File” or “Add Folder” button.
8. Browse your computer and select the files or folder you want to transfer.
9. Click “Open” to start the file transfer process.
Method 3: How to Send Files to iPhone using Third-Party Apps:
If the built-in methods don’t suit your needs, you can use third-party apps to send files from a Windows 10 computer to an iPhone. These apps are specifically designed to facilitate file transfer between different devices and operating systems. Here’s how you can do it:
Pros:
– Offers a wide range of features and functionalities.
– Allows transfer of various file types.
– Can provide faster transfer speeds compared to other methods.
Cons:
– Some apps may require payment or have limitations on file size.
– Additional software installation may be required.
– Security concerns with third-party apps.
1. Start by choosing a third-party app that suits your requirements, such as Dropbox, Google Drive, or SHAREit.
2. Download and install the app on your Windows 10 computer and iPhone from their respective app stores.
3. Sign in to the app using your account or create a new one if necessary.
4. On your computer, open the app and navigate to the files or folder you want to send to your iPhone.
5. Select the files or folder and choose the option to share or send.
6. Select your iPhone from the list of available devices or enter your iPhone’s unique identifier.
7. Confirm the transfer and wait for the process to complete.
8. On your iPhone, open the app and navigate to the transferred files or folder.
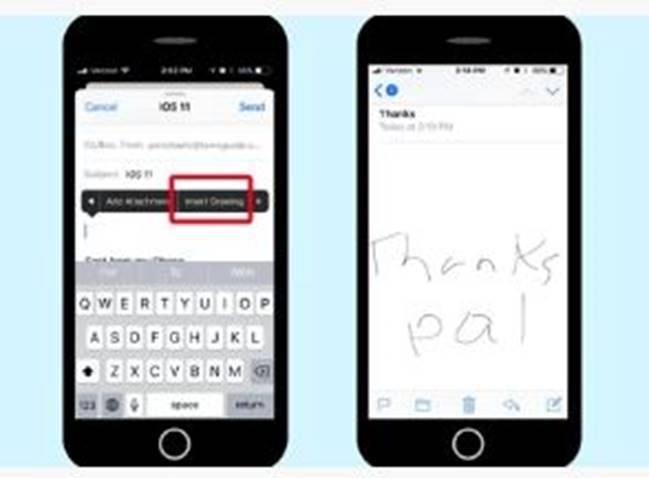
Method 4: How to Send Files to iPhone using Email:
If you only need to send a few files and don’t want to rely on external software or cloud storage, you can use email to send files from a Windows 10 computer to an iPhone. Most email services have file attachment features that allow you to send files of various types and sizes. Here’s how you can do it:
Pros:
– Simple and widely available method.
– No additional software or account setup required.
– Can send files of various types and sizes.
Cons:
– Limited file size depending on email service provider.
– Email attachments may be blocked or flagged as spam.
– Requires an active internet connection.
1. Start by opening your preferred email service provider on your Windows 10 computer.
2. Compose a new email and enter your iPhone’s email address in the recipient field.
3. Add a subject and any message you want to include in the email.
4. Look for the option to attach files or insert attachments. It is usually represented by a paperclip icon.
5. Click on the attach or insert attachment option and browse your computer to select the files you want to send.
6. Select the files and click on the “Attach” or “Open” button.
7. Wait for the files to be attached to the email.
8. Finally, click on the send button to send the email with the attached files.
9. On your iPhone, open the email app and navigate to the received email.
10. Tap on the attached files to view or save them to your device.
Alternatives: What to Do If You Can’t Send Files to iPhone:
If you are unable to send files to your iPhone using the methods mentioned above, don’t worry. There are several alternative solutions you can try:
1. Use a file transfer app: There are many file transfer apps available on the App Store that allow you to send files from a Windows 10 computer to an iPhone wirelessly. Some popular apps include Feem, Xender, and Send Anywhere.
2. Use a cloud storage service: Instead of sending files directly to your iPhone, you can upload them to a cloud storage service like Google Drive, Dropbox, or Microsoft OneDrive. Then, you can access and download those files on your iPhone.
3. Use a USB flash drive: If you have a USB flash drive, you can transfer files from your Windows 10 computer to the flash drive and then connect the flash drive to your iPhone using a Lightning to USB adapter. This method requires specific accessories but can be useful if you frequently transfer large files.
Bonus Tips:
Here are some bonus tips to enhance your file transfer experience from a Windows 10 computer to an iPhone:
1. Ensure your iPhone is connected to your Windows 10 computer using a reliable cable or Wi-Fi network.
2. Keep your Windows 10 computer and iPhone updated with the latest software versions to ensure compatibility.
3. Check the file format compatibility on your iPhone for the files you want to transfer. Some file formats may not be supported by default apps on iOS.
4. If security and privacy are a concern, choose third-party apps and cloud storage services that offer encryption and secure data transfer options.
5. Always double-check the files before sending to avoid any accidental transfer of unwanted or confidential information.
5 FAQs about Sending Files to iPhone from Windows 10:
Q1: Can I transfer files from a Windows 10 computer to an iPhone without using any cables?
A: Yes, you can transfer files from a Windows 10 computer to an iPhone wirelessly using third-party apps like Feem, Xender, or Send Anywhere. These apps create a local network connection between devices, allowing you to easily transfer files.
Q2: Why can’t I transfer certain file types from my Windows 10 computer to my iPhone?
A: The limitation on transferring certain file types depends on the file formats supported by default apps on iOS. If a file format is not supported, you may need to use third-party apps or convert the file to a compatible format before transferring.
Q3: Can I transfer files from a Windows 10 computer to an iPhone using a USB cable?
A: Yes, you can transfer files from a Windows 10 computer to an iPhone using a USB cable. By connecting your iPhone to your computer and using iTunes, you can transfer various file types, including music, videos, and documents.
Q4: Is there a file size limit when transferring files to an iPhone?
A: The file size limit when transferring files to an iPhone depends on the method you are using. For example, when sending files via email, there is usually a file size limit imposed by your email service provider. However, using third-party apps or cloud storage services may allow larger file transfers.
Q5: Are there any file formats that are not supported on iOS?
A: While iOS supports a wide range of file formats, there are some file types that may not be playable or viewable by default apps on iOS. For example, certain video formats or specialized file formats may require specific apps or conversions to be compatible with iOS devices.
In Conclusion:
Sending files from a Windows 10 computer to an iPhone may seem like a daunting task, but with the right methods and tools, it can be a straightforward process. In this blog post, we explored several methods, including using iCloud, iTunes, third-party apps, and email. Each method has its own pros and cons, so you can choose the one that best fits your needs. Additionally, we provided alternative solutions, bonus tips, and answered some frequently asked questions to help you overcome any challenges you may encounter. Now, you should be able to transfer files to your iPhone from your Windows 10 computer with ease.